Authenticating with the Trackpac API
Trackpac supports two authentication methods:
X-API-Keyheader, which is the preferred option for all API integrations- Bearer tokens, which remain available for legacy workflows
Recommended: Use an API Key
API keys are easier to manage than login-based bearer tokens and work across the full API.
Generate an API key
- Sign in to the Trackpac app at https://app.trackpac.io.
- Open your account page at https://app.trackpac.io/account.
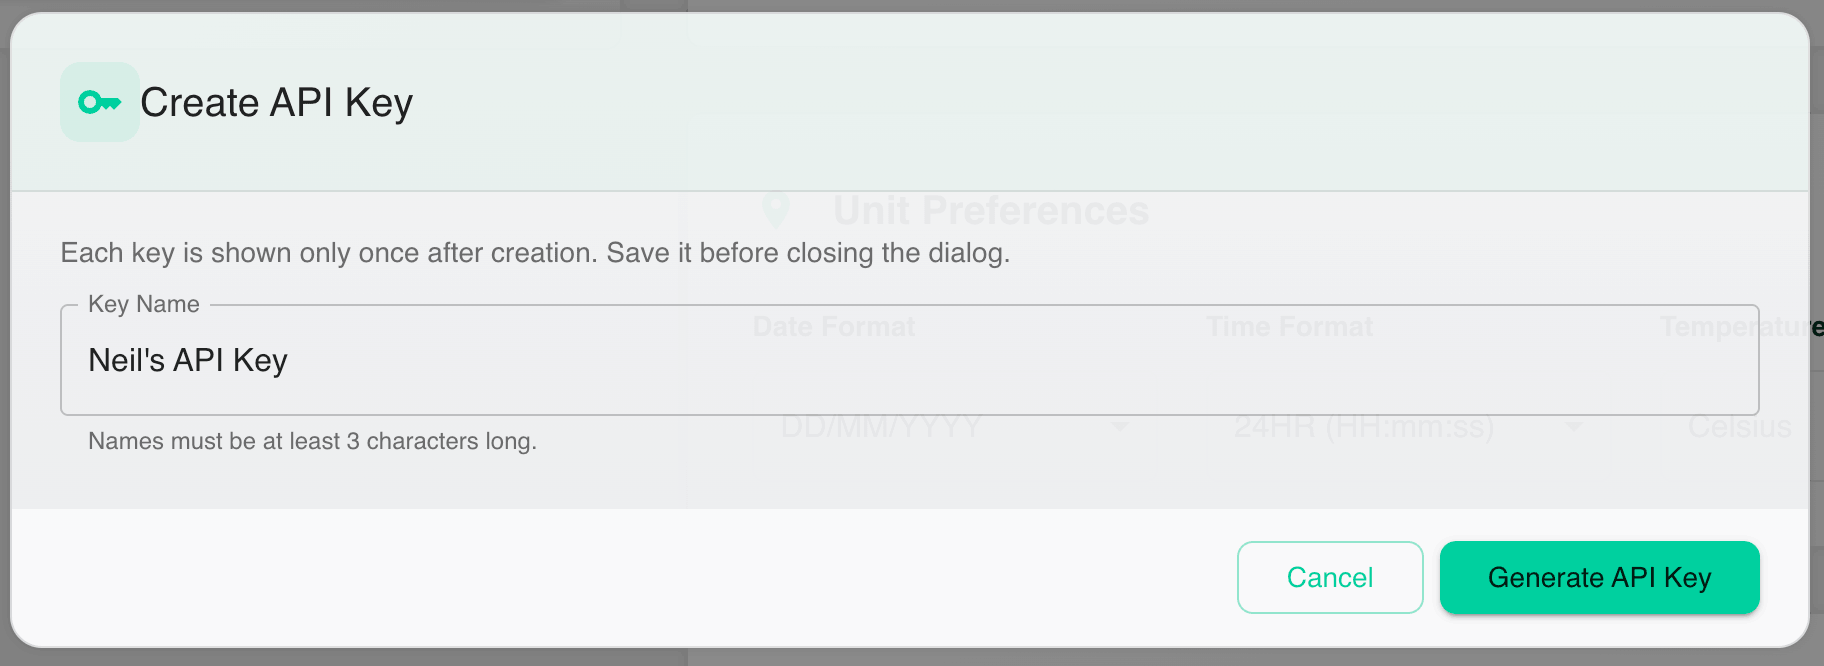
- Create a new API key and give it a friendly name of at least 3 characters.
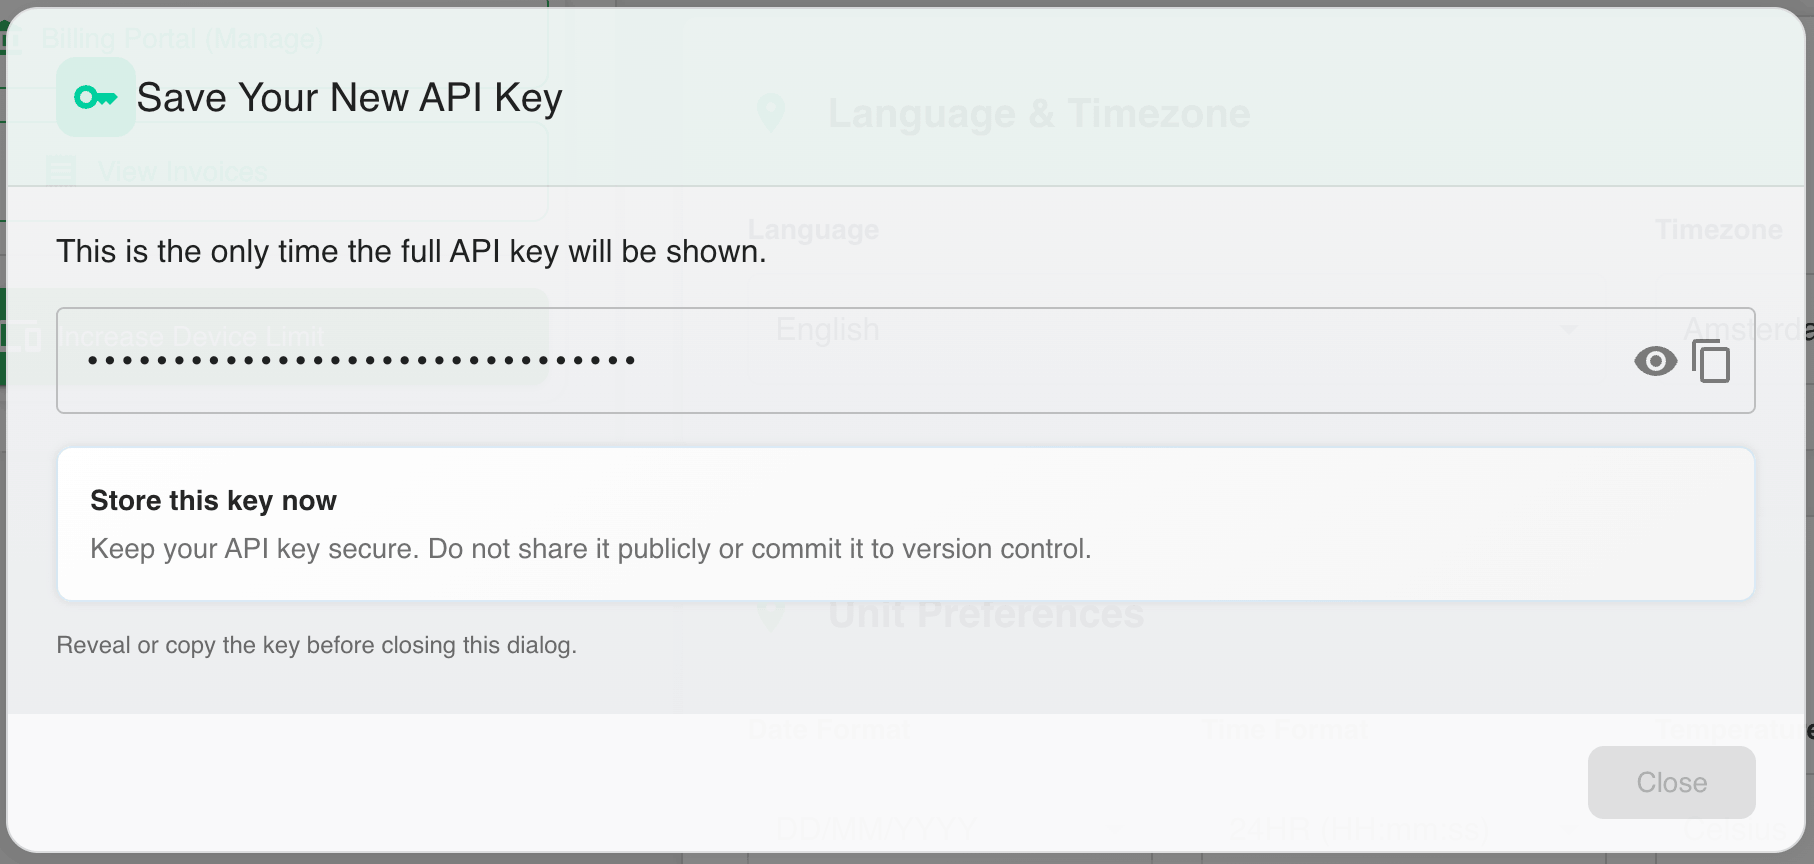
- Copy and store the API key immediately. For security, it is only shown once and is stored hashed on our side.
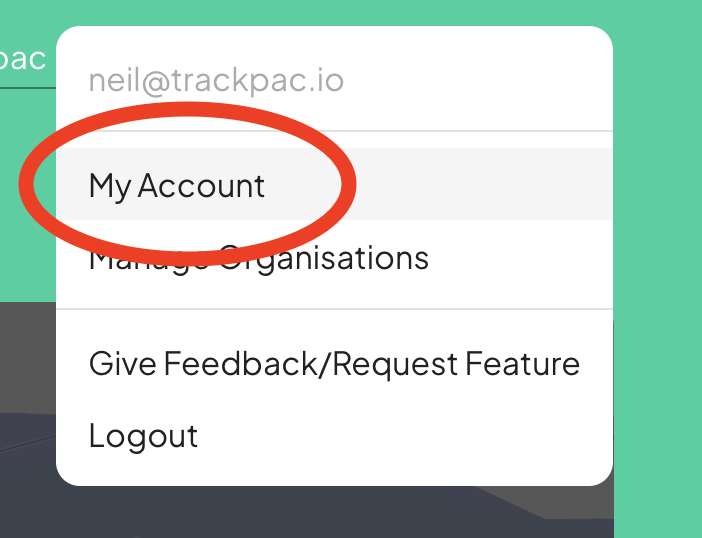
Use the account menu to open your account page:

Then follow the API key creation flow:
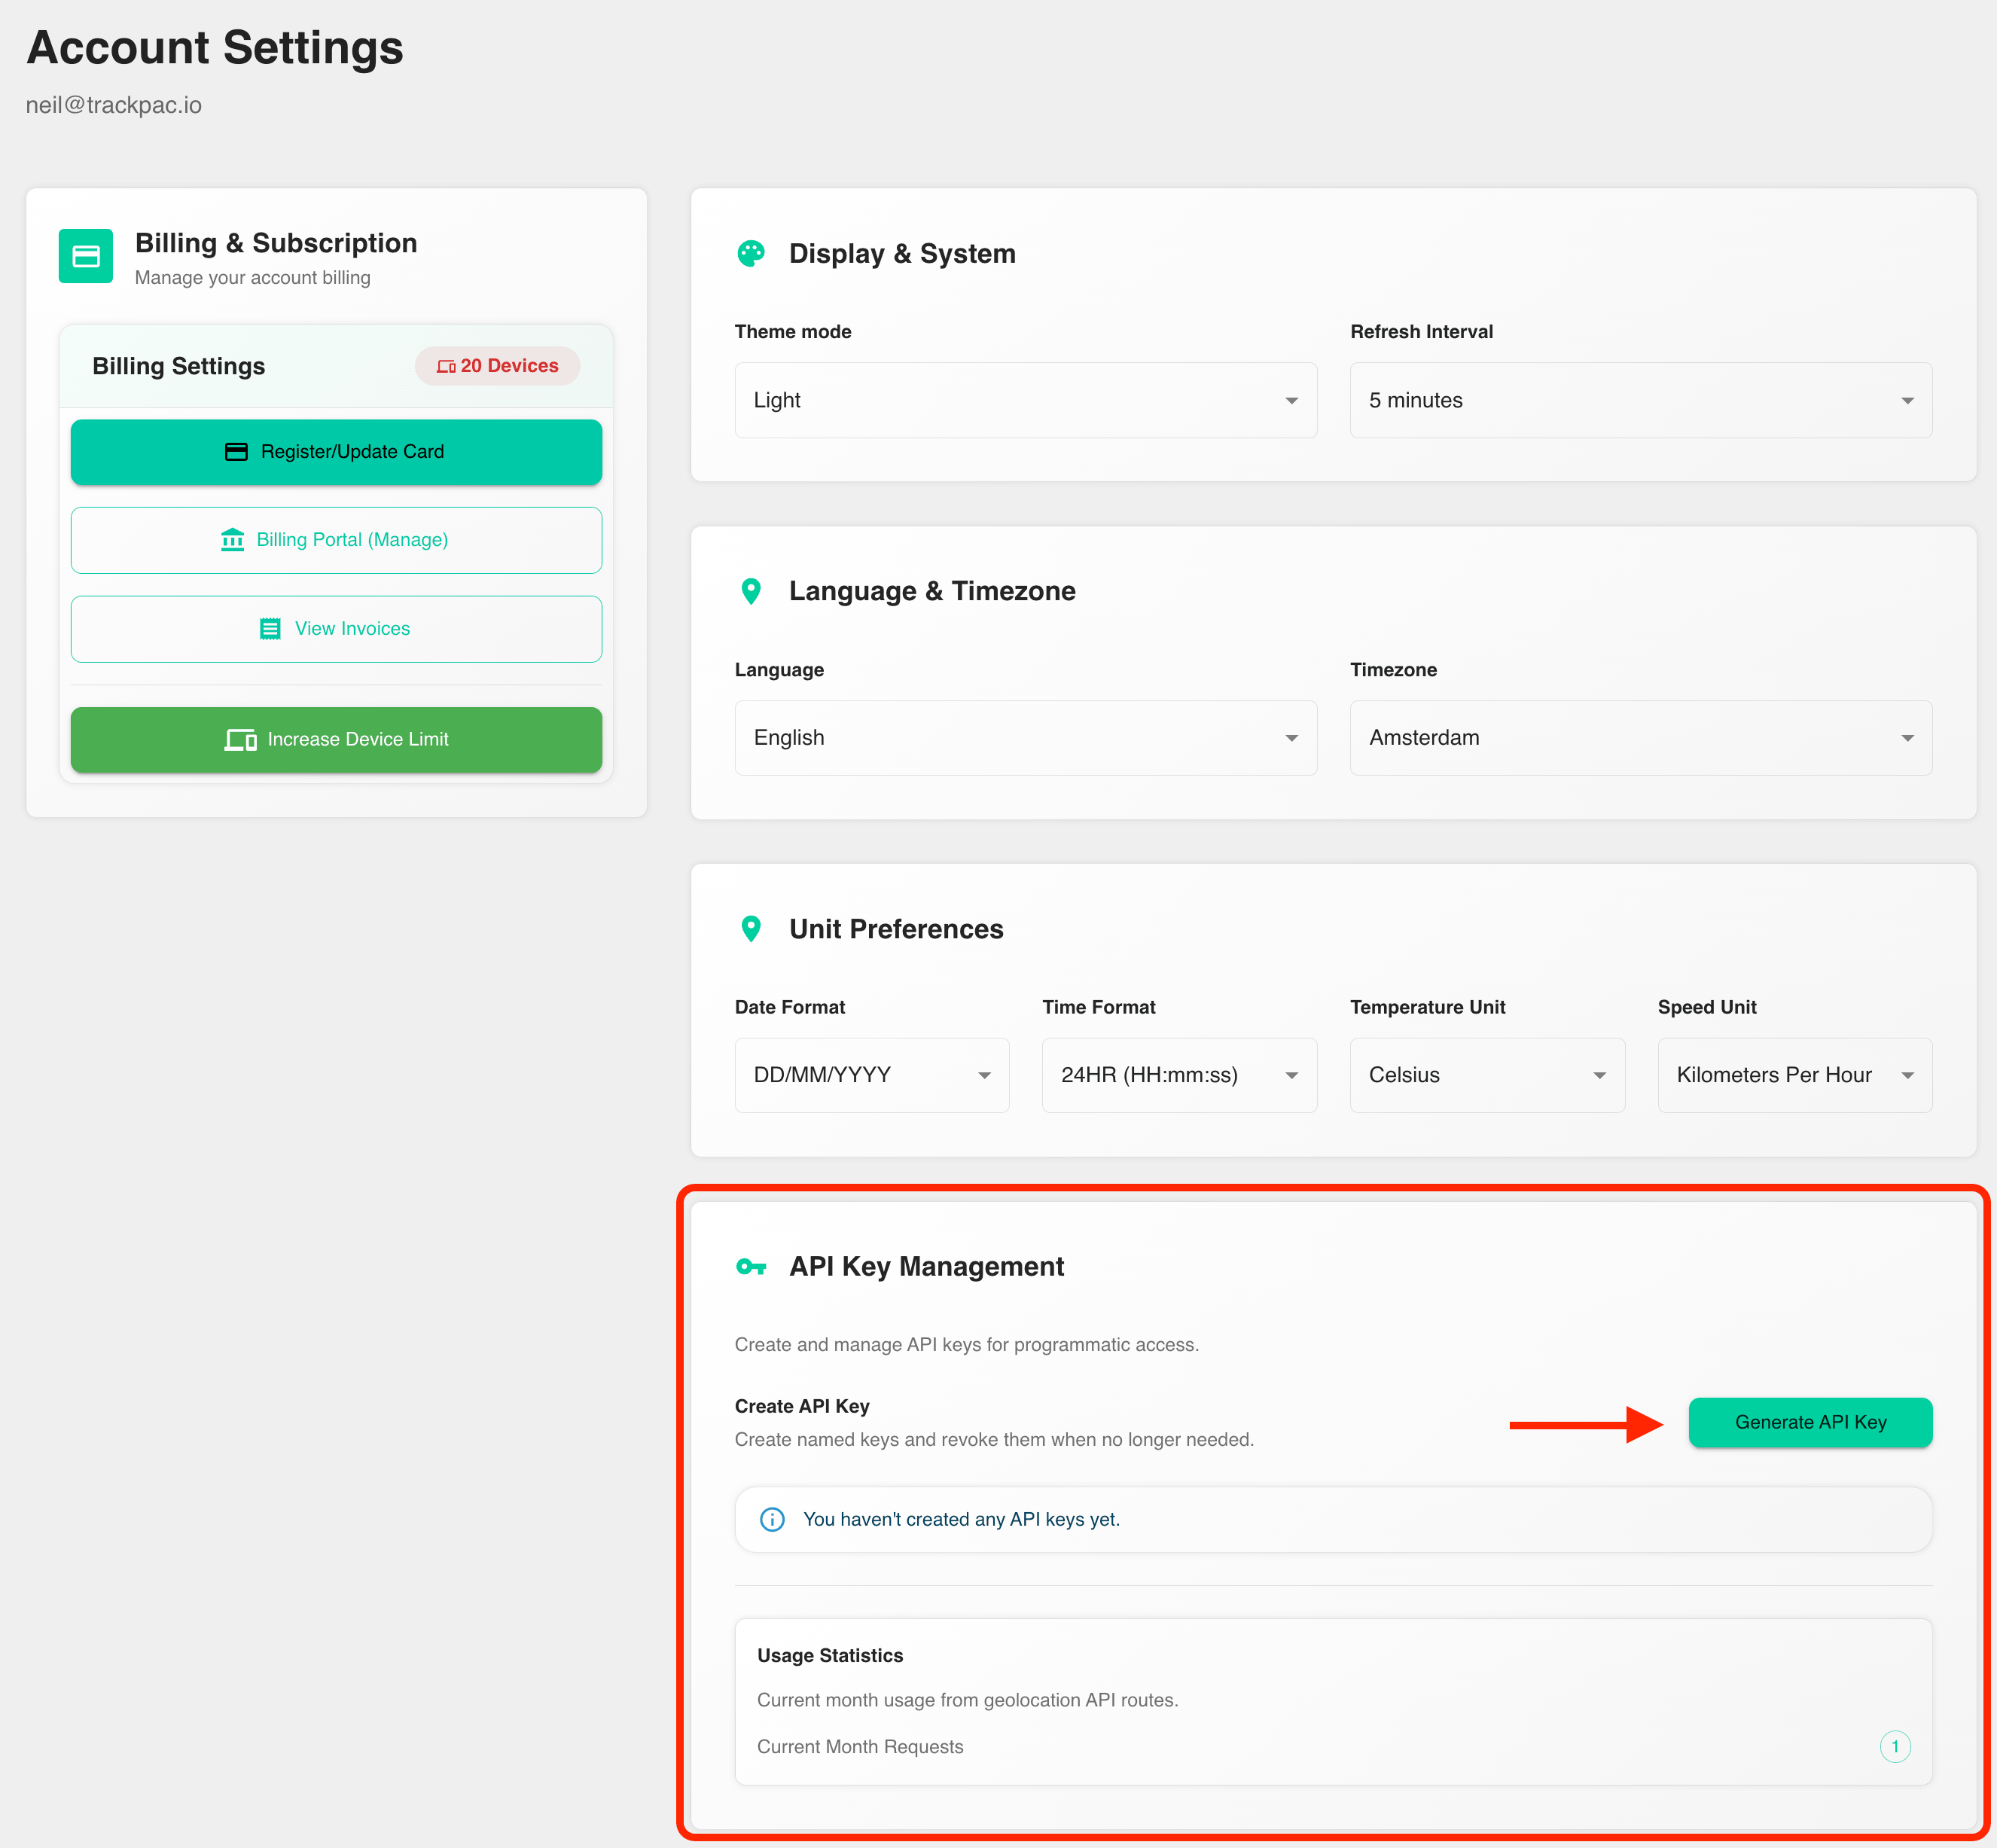
You can also revoke existing API keys from the same account page at any time.
Use the API key in requests
Send your API key in the X-API-Key header on every request:
curl --request GET \
  --url https://api.trackpac.io/devices \
  --header 'X-API-Key: YOUR_API_KEY'
Security Notes
- Treat API keys and bearer tokens like passwords.
- Store credentials in a secret manager or environment variable, not in source control.
- Revoke and replace an API key immediately if it is exposed.